

Recycling clay // reclaim
In the studio I throw and hand build pieces and with every batch I make, clay waste is produced, from the slop that builds up around the potters wheel to the scarps carved off an Aloof mug. It builds up quickly and has the potential to become a health hazard and economically and environmentally wasteful.
If left damp and exposed in the studio it grows bacteria’s which is great for the clay, if its recycled at a later point! But mold growth and bacterial incubation is not so great to be around, especially for those with mold allergies.
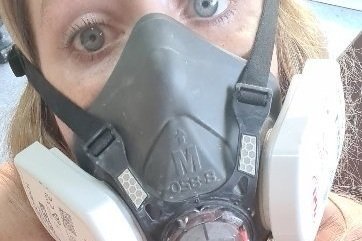
If left uncovered to dry out its teeny tiny particles can become air born and find its way into the lungs, so a specialist mask has to be worn to prevent the serious risk of potters lung disease (also know as Sillicosis).
If wet sloppy clay is poured down the drain (without a specialist clay trap insulted), the plumbing, sewer and septic systems will all suffer and become a living nightmare.
So considering all of the above, we can conclude that clay waste definitely needs to be managed effectively. If you put it all in the bin and send it straight to landfill then ‘hey presto’ all of these problems disappear however a few new ones definitely arise.
All clay is recyclable and reusable but its not an easy job if you don’t keep on top of it! Larger studios and educational facilities have a tough time recycling clay purely because of the large qualities they have to process. Some will be awesome at it and employ a specialist technician to take on the laborious task. Others will be overwhelmed and just chuck it in the bin.
There are these beasty machines called pugmills that help speed up the process however they are proper expensive, take up loads of space and require a lot of looking after, so many studio potters working on a small scale choose to do it by hand.

I can confirm that I always recycle my clay using two lovely processes. The first being ‘reclaim’ and the second being, creating and using ‘crocks’. I also have a clay trap on my studio sink which is an absolute must for any sink being used around ceramic work.
The term reclaim is referring to the process of recycling clay that hasn’t been fired yet.
During the making of pieces, mistakes are made and scarps and excess builds up, so rather than throw it away, it can be brought back to its original state over and over again.
Even the holes from my oil burners become something new!
My reclaim process:
There is more than one way to reclaim clay and I have tried a few methods but this is the one that stuck and works best for me and my practice.
Firstly I had to make a plaster batt using a frame that my last father in law made me which I treasure. There are plenty of videos on you tube for anyone wanting to make a batt! Plaster is the perfect surface to use because it quickly sucks out the water from the clay and helps you create an as new batch ready to throw with. I will add a link to some videos at the end.

Over a period of time I collect up the scarps produced from my waste. I need to make sure it is completely dry so I normally leave it near the kiln laid out on a wooden board, but sometimes if my work pattern is right, I just leave it to do it thing in the wheel tray.
It dries within a few days and then I transfer it to a bucket with a lid (whilst wearing a mask of course).
Once the bucket is full I then fill it with saved slop and a little extra water, ensuring that it is completely covered.
Slop is the clay found in the dirty water that I use to throw with.
Every time I throw, I leave the dirty water in a second bucket. The following day when all the clay particles sink to the bottom, I pour away the water left sat on top. I’m left with a clay slop which is full of the good stuff that makes clay nice to throw with.
The techy term for ‘the good stuff’ is plasticity, which means the element in the clay that allows it to change shape without cracking, warping and all the ‘not so good stuff’.

So slop its like liquid gold and you definelty don’t want to not include it in your reclaim.
I leave the mixture to settle overnight, allowing at the dry clay to soak up the goodness and then pour of the excess water from the top. Using a power drill with a paint mixer attached I then mix up the content to a nice butter like consistency.
Now the mixture is ready to be transfer to my plaster bats. I use a big old table spoon and serve it out onto the plaster spoonful by spoonful.

once the bat is covered, I use the back of the spoon to smooth it out, like I’m raking a Zen garden, I enjoy making a pattern on the surface which has no purpose other than joy :)
the final stage is to leave the clay to dry out for a few days however this timeframe very much depends on the weather and plaster. To achieve the perfect consistency you need to check in on it every now and again. I use a rib at the edge and if the clay is ready to peel off the plaster in one piece then it is done but if it sticks then its not quite ready. its all very goldie locks finding your ‘just right’.
One way to test it out is to push your finger into it and assess whether it feels similar to the clay in your pre-prepared bags. Once peeled off the plaster, its time to wedge the new batch of reclaimed clay and bag it up ready to throw.
Wedging is another one of those really important skills a potter needs as it removes all the air from within the clay and if you skip this process then your likely to cause explosions in the kiln later down the line and that is not a pretty sight!
So thats the method I use, its simple and very effective and all unfired clay gets to be endlessly recycled and go on to fulfil its potent to become a functional object for many years to come. MAGIC!
Link to: SIMON LEACH - Making a plaster bat for drying out wet clay
There are many links to making bats but I picked this one to share because he uses a wooden frame (like me) rather than a plastic box and I just think its a more eco-friendly that way.